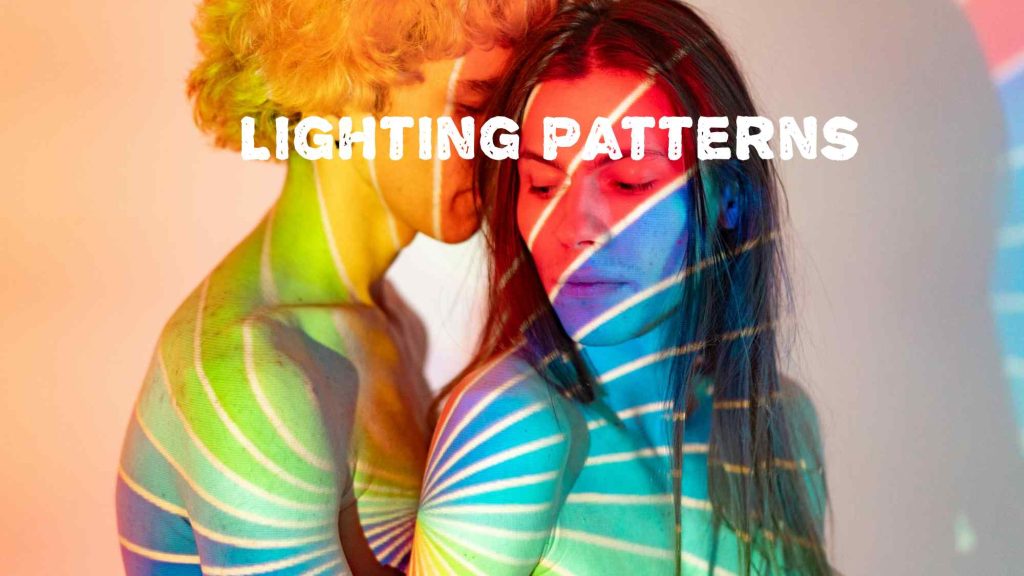
Learn the Classic Techniques That Define Professional Portraiture
Lighting is the brushstroke of photography. When photographing portraits indoors, understanding lighting patterns can elevate your images from simple snapshots to polished, professional work. These patterns shape your subject’s face, emphasize mood, and even help flatter different face shapes.
In this blog, you’ll learn the 5 classic portrait lighting patterns, how to create them indoors, and when to use each one for maximum visual impact.
🎯 What Are Portrait Lighting Patterns?
Lighting patterns refer to the placement of your main light in relation to your subject’s face. They affect how shadows fall across facial features—sculpting, slimming, or softening different areas.
These patterns are foundational techniques in portrait photography and are widely used in:
- Headshots
- Editorial portraits
- Studio fashion photography
- Cinematic character portraits
Mastering them gives you more creative control and helps you work effectively in any indoor environment—even with minimal gear.
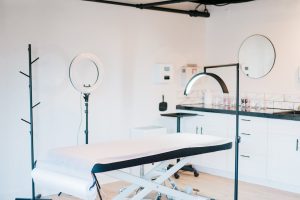
🛠️ Basic Indoor Setup for Testing Lighting Patterns
✅ Gear You’ll Need:
- One key light (speedlight, strobe, or LED panel)
- Light modifier (softbox, umbrella, or reflector dish)
- White or neutral-colored wall/background
- Tripod (optional)
- A patient model or stand-in (even a mannequin!)
💡 Tip: Use a soft light to begin with, especially for learning—then experiment with harder light for drama.
📸 1. Loop Lighting
Look: Small shadow loops off the subject’s nose
Best For: Most face types, especially round or oval
Mood: Natural, flattering, and slightly dimensional
🔧 How to Create It:
- Place your light at about 30–45° to one side of the subject and slightly above eye level.
- The nose shadow should loop down and slightly to the side, but not touch the cheek.
- The shadow under the nose is key—too long or connected = not loop lighting.
Why It Works:
It adds depth while still keeping both sides of the face relatively well-lit.
🎭 2. Rembrandt Lighting
Look: Triangle of light on the cheek opposite the light source
Best For: Dramatic portraits, angular or masculine faces
Mood: Cinematic, moody, intense
🔧 How to Create It:
- Move your key light higher and more to the side than in loop lighting—about 45–60°.
- The key shadow should fall across the side of the face, creating a triangle of light under the eye on the far cheek.
- Ensure only one eye is lit, or partially lit.
Why It Works:
Named after the painter Rembrandt, this pattern is ideal for adding mood and shape to the face.
💡 Pro Tip: Works great in black-and-white photography.
💡 3. Butterfly Lighting (a.k.a. Paramount Lighting)
Look: Symmetrical light with a shadow directly under the nose (shaped like a butterfly)
Best For: Glamour and beauty shots, female portraits
Mood: Clean, elegant, flattering
🔧 How to Create It:
- Place your light directly in front and slightly above the subject’s face (about 10–15° overhead).
- The shadow under the nose should be short and symmetrical.
- Consider using a reflector or fill light below the face to reduce shadows under the chin.
Why It Works:
Flattens skin texture and highlights cheekbones. Very flattering for makeup and close-up portraits.
🕶️ 4. Split Lighting
Look: One side of the face is lit; the other is in shadow
Best For: Moody, bold, character portraits
Mood: Dramatic, edgy, mysterious
🔧 How to Create It:
- Place your key light at 90° to the subject—completely to the side—and slightly above eye level.
- The result is half-lit, half-shadow on the face.
- No fill light = high contrast. Add a bounce if you want to retain a bit of detail.
Why It Works:
Split lighting adds tension and personality. It’s often used in editorial, music, or storytelling photography.
🌘 5. Broad and Short Lighting
These are not separate lighting patterns, but variations based on which side of the face is lit.
🔹 Broad Lighting:
- The side of the face facing the camera is lit.
- Makes faces appear wider.
- Use for subjects with narrow faces or to show fullness.
🔹 Short Lighting:
- The side of the face facing the camera is in shadow.
- Makes faces appear slimmer.
- Adds mood and depth—great for character or dramatic portraits.
How to Switch:
- Simply rotate your subject slightly while keeping the light in the same position.
- It’s a subtle change, but very powerful in shaping perception.
🧪 Experimenting Indoors: Practice Tips
- Use a mirror or stand-in to study shadow shapes as you adjust the light.
- Photograph each lighting pattern in the same setting to compare results.
- Try different modifiers—a beauty dish, softbox, or bare bulb will each affect the shadow edges.
- Shoot in black and white to focus purely on light and shadow.
⚠️ Common Mistakes to Avoid
❌ Key light too low – Results in unnatural shadows
❌ Lighting patterns blending together – Keep your subject still when adjusting angles
❌ Using too much fill – Can cancel out the pattern you’re trying to create
❌ Ignoring subject’s face shape – Different patterns flatter different features
🧠 Final Thoughts: Know the Rules, Then Break Them
Mastering portrait lighting patterns doesn’t mean you have to follow them all the time—but knowing them gives you control. Once you can recognize and create loop, Rembrandt, butterfly, and split lighting on demand, you’ll know how to light any face in any mood, indoors or out.
🎙️ Great light isn’t accidental—it’s intentional. Learn the patterns, then bend them to your creative will.
🔔 Follow Photoclick for More Lighting Wisdom
Whether you’re building your home studio or mastering dramatic setups, Photoclick is your go-to source for photography tips, gear guides, and lighting breakdowns.
Want a downloadable cheat sheet or lighting diagrams for these portrait patterns? Let us know—we’ll send it your way!