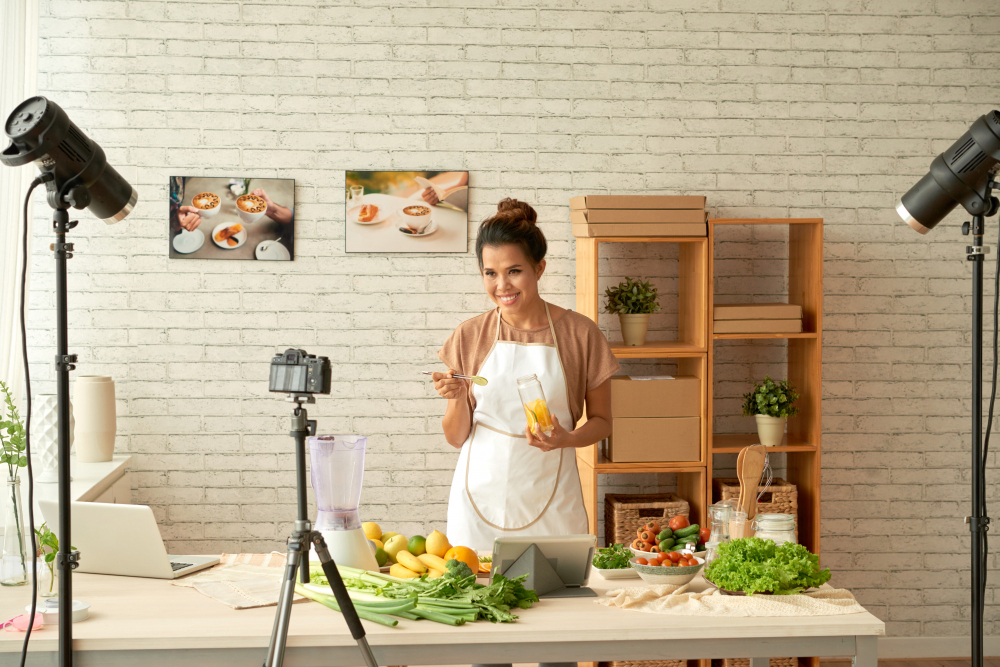
Why Product and Food Photography Techniques Matter in 2026
In today’s digital marketplace, customers don’t walk into a store; they scroll through your feed or site before deciding to buy. For food brands, restaurants, and e‑commerce stores, product and food photography techniques are no longer optional—they’re core marketing tools.
Badly lit, cluttered, or flat images make even delicious food or premium products look cheap. On the other hand, strong product and food photography techniques can make a simple dish look like a magazine spread and turn a plain package into an Instagram‑worthy hero shot.
In this guide, we’ll break down practical, step‑by‑step product and food photography techniques that work for bloggers, brands, and small businesses in 2026.
1. Understand the Purpose of Your Shot
Before you even pick up your camera, ask:
- Is this for Instagram or Pinterest (lifestyle, mood‑driven)?
- Is it for an e‑commerce product page (clean, technical, clear)?
- Is it for a menu or recipe blog (tasty, authentic, slice‑of‑life)?
Each purpose changes the styling, angle, and detail level you need. For example:
- E‑commerce product shots focus on clarity, consistency, and neutral backgrounds.
- Food blog shots emphasize texture, freshness, and inviting warmth.
Defining your purpose early keeps your product and food photography techniques focused and intentional rather than random.
2. Lighting Techniques That Make Food and Products Pop

Lighting is the single biggest factor in food and product photography. In 2026, the trend is still soft, natural light with minimal harsh shadows.
Natural Light Tips
- Shoot near a large window in the morning or early afternoon.
- Use a white foam board or reflector opposite the window to bounce light and soften shadows.
- Avoid direct overhead light at midday; it creates harsh lines and blown‑out highlights.
If you’re shooting indoors at night or in low light, supplement with:
- A softbox or ring light for even, diffused illumination.
- A diffuser (white cloth or professional diffuser) between the light source and the subject to avoid harsh highlights.
For both food and products, side or back‑side lighting often works best because it highlights textures—like crust on bread or texture on packaging—without flattening the image.
3. Backgrounds and Styling for Food and Products
Clutter kills an otherwise great shot. Strong product and food photography techniques rely on clean, intentional styling.
For Food Photography
- Choose simple backgrounds: neutral boards, marble, wood, or solid‑color backdrops.
- Pick 2–3 props max: fork, napkin, herbs, or a small bowl to add context without overcrowding.
- Use elements that tell a story: a coffee mug next to a pastry, or a wine glass beside a main dish.
For Product Photography
- Use white or light‑gray backgrounds for classic e‑commerce looks.
- Try lifestyle backgrounds when you want emotion—a product on a kitchen counter, a laptop on a café table, etc.
- Keep surfaces clean and dust‑free; even tiny smudges show up in close‑ups.
A good rule of thumb: if the viewer looks at the props first, you’ve over‑styled. The food or product should always be the hero.
4. Camera Settings and Lenses for Crystal‑Clear Shots
You don’t need the most expensive camera, but you do need to understand the basics. Here are simple product and food photography techniques that apply to DSLRs, mirrorless, and even advanced smartphone cameras.
Recommended Settings (Starting Point)
- Aperture (f‑stop):
- Use f/2.8–f/5.6 for food to create a shallow depth of field and make the main dish pop.
- Use f/8–f/11 for product shots where you want the entire object in focus.
- Shutter Speed:
- Keep it faster than 1/60s to avoid camera shake, or use a tripod.
- ISO:
- Keep it as low as possible (100 or 200) to reduce noise. Increase only when lighting is poor.
- White Balance:
- Set to daylight or custom so colors look natural instead of too warm or too blue.
Lens Choices
- Macro lens (for close‑ups of toppings, packaging details, or textures).
- 50mm prime lens (versatile, great for food and product shots).
- Wide‑angle lens (for flat‑lays or tabletop scenes with multiple items).
If you’re using a smartphone, use portrait mode for food to blur the background and keep the product in focus.
5. Angles and Composition for Better Food and Product Shots
Angling is one of the most underrated product and food photography techniques. The same dish can look flat from one angle and irresistible from another.
Common Angles
- Overhead (flat‑lay):
- Perfect for breakfast boards, pizzas, or styled flat‑lay product shots.
- Gives a clean, editorial look common on Instagram and Pinterest.
- 45‑degree angle:
- Ideal for burgers, pastas, sandwiches—anything with height.
- Shows both the top and a bit of the side, making plates look more 3D.
- Straight‑on (front):
- Great for layered desserts, drinks in glasses, or bottles and jars.
- Highlights vertical stacking and layers.
Composition Tips
- Use the rule of thirds—place the hero item off‑center for visual interest.
- Create leading lines with cutlery, fabric, or ingredients to guide the eye toward the food or product.
- Avoid cutting objects in half at the edges of the frame; keep complete shapes visible.
6. Styling and Plating for Food Photography
Food styling is part of product and food photography techniques too. Even the best lighting looks off if the food appears dry, messy, or dull.
Simple Food Styling Tips
- Make food look fresh:
- Brush a tiny bit of oil or syrup on fruits and vegetables for shine.
- Sprinkle fresh herbs or a light dusting of powdered sugar on desserts.
- Use layers and height:
- Stack pancakes, burgers, or sandwiches so they look fuller.
- Layer sauces or garnishes just before shooting.
- Control what’s in the frame:
- Remove crumbs, smudges, or messy edges with tweezers or a damp cloth.
For example, a drip‑down sauce or melted cheese can look delicious if controlled, but messy if overdone. Practice a few test shots to perfect the look.
7. Product Photography Techniques: Detail Shots and Lifestyle Context
For products, you need more than just a plain shot. Modern consumers want to see details, scale, and usage.
Key Product Shots to Include
- Clean commercial shot: Object on a plain background, sharp and well‑lit.
- Detail shot: Close‑up of textures, labels, or key features.
- Lifestyle shot: Product in use—someone holding it, placing it on a table, or in a room setting.
- Flat‑lay or grid layout: Multiple products arranged neatly for Instagram or catalogs.
Use consistent angles and lighting across all product images so your brand looks cohesive and professional.
8. Editing and Post‑Production for Food and Product Shots
Editing isn’t cheating—it’s finishing. Strong product and food photography techniques include smart post‑processing.
Basic Editing Steps
- Adjust exposure and contrast: Brighten the shadows slightly and increase contrast to make colors pop—without overdoing it.
- Tweak white balance: Make sure the food or product looks natural, not sickly yellow or icy blue.
- Sharpen and clean:
- Use light sharpening to bring out textures.
- Remove dust spots or small distractions with the clone or healing tool.
Popular Tools in 2026
- Lightroom or Capture One for desktop editing.
- Snapseed, VSCO, or Lightroom Mobile for quick smartphone edits.
- Canva or Photoshop for adding text overlays, logos, or consistent branding.
Avoid overly aggressive filters that distort colors; subtle, natural edits perform better across platforms.
9. Quick Camera Settings Cheat Sheet for 2026
Here’s a quick reference you can pin while shooting:
| Use Case | Aperture | Focus Point | Notes |
|---|---|---|---|
| Flat‑lay food | f/5.6–f/8 | Center of main dish | Ensure everything sharp. |
| Close‑up food detail | f/2.8–f/4 | Key ingredient or texture | Shallow DOF, blurred background. |
| E‑commerce product | f/8–f/11 | Entire product | Full clarity. |
| Lifestyle product shot | f/4–f/6.3 | Product in context | Some background blur. |
This cheat sheet helps you apply the right product and food photography techniques without over‑thinking in the moment.
10. How to Build a Consistent Visual Brand
Once you master the techniques, the next step is branding your visual style. Consistency in your food and product photography builds recognition and trust.
Tips to Build a Brand Style
- Choose a consistent color palette (e.g., warm neutrals, pastels, or moody tones).
- Stick to a preferred angle or composition style across posts.
- Use the same editing preset or filters for all images.
- Keep props and backgrounds similar or interchangeable.
For example, if your Instagram feed is known for warm, wooden‑table food shots, don’t suddenly switch to cold, white‑tile backgrounds without reason.
Final Thoughts
Product and food photography techniques are not just about having a good camera—they’re about using lighting, composition, styling, and editing in a smart, repeatable way. In 2026, brands that invest in strong visual storytelling will stand out in crowded feeds and crowded marketplaces.
Whether you’re shooting for a restaurant menu, an online store, or a recipe blog, start with one or two of these techniques—like mastering natural light and choosing one signature angle—and build from there. Over time, your portfolio will look more professional, enticing, and ready to sell.